
Showing posts with label New York Academy of Art. Show all posts
Showing posts with label New York Academy of Art. Show all posts
Friday, April 14, 2017


Thursday, April 13, 2017

Wednesday, April 12, 2017
Triumph - Day 1
 |
| Day 1, Oil on Linen, 72"x 96". 2017 |
Today was our final group critique with my thesis advisor Peter Drake. It was a lot of fun. I am really happy with the amount of work I've been able to get done.
Thursday, March 16, 2017
Alison 3/16/17
 |
| Alison 03/16/17, Oil on Linen, 36"x 60", 2017 |
This painting has a real presence to it. I am starting to get the hang of this particular painting technique.
Thursday, March 2, 2017
Alison 03/02/17
 |
| Alison 03/02/17, Oil on Canvas, 30"x48", 2017. |
Bernardo's class opened with a lecture on Michelangelo and Leonardo. They really play off each other thematically. Aristotelian vs. Neoplatonism, atmospheric haze vs. solid form; plenty of discussion to be had.
Think I'm getting the hang of this painting method. Not closing the shapes is super difficult for me, but I think I did okay with this one. I keep visualizing the painting, like a net or a bowl where the surface of the form is this shape. Then thin points in the painting read like holes in the net. So each pass of paint and marks becomes trying to fill in those holes.
Thursday, February 23, 2017
Wednesday, February 22, 2017

Tuesday, February 21, 2017

Monday, February 20, 2017
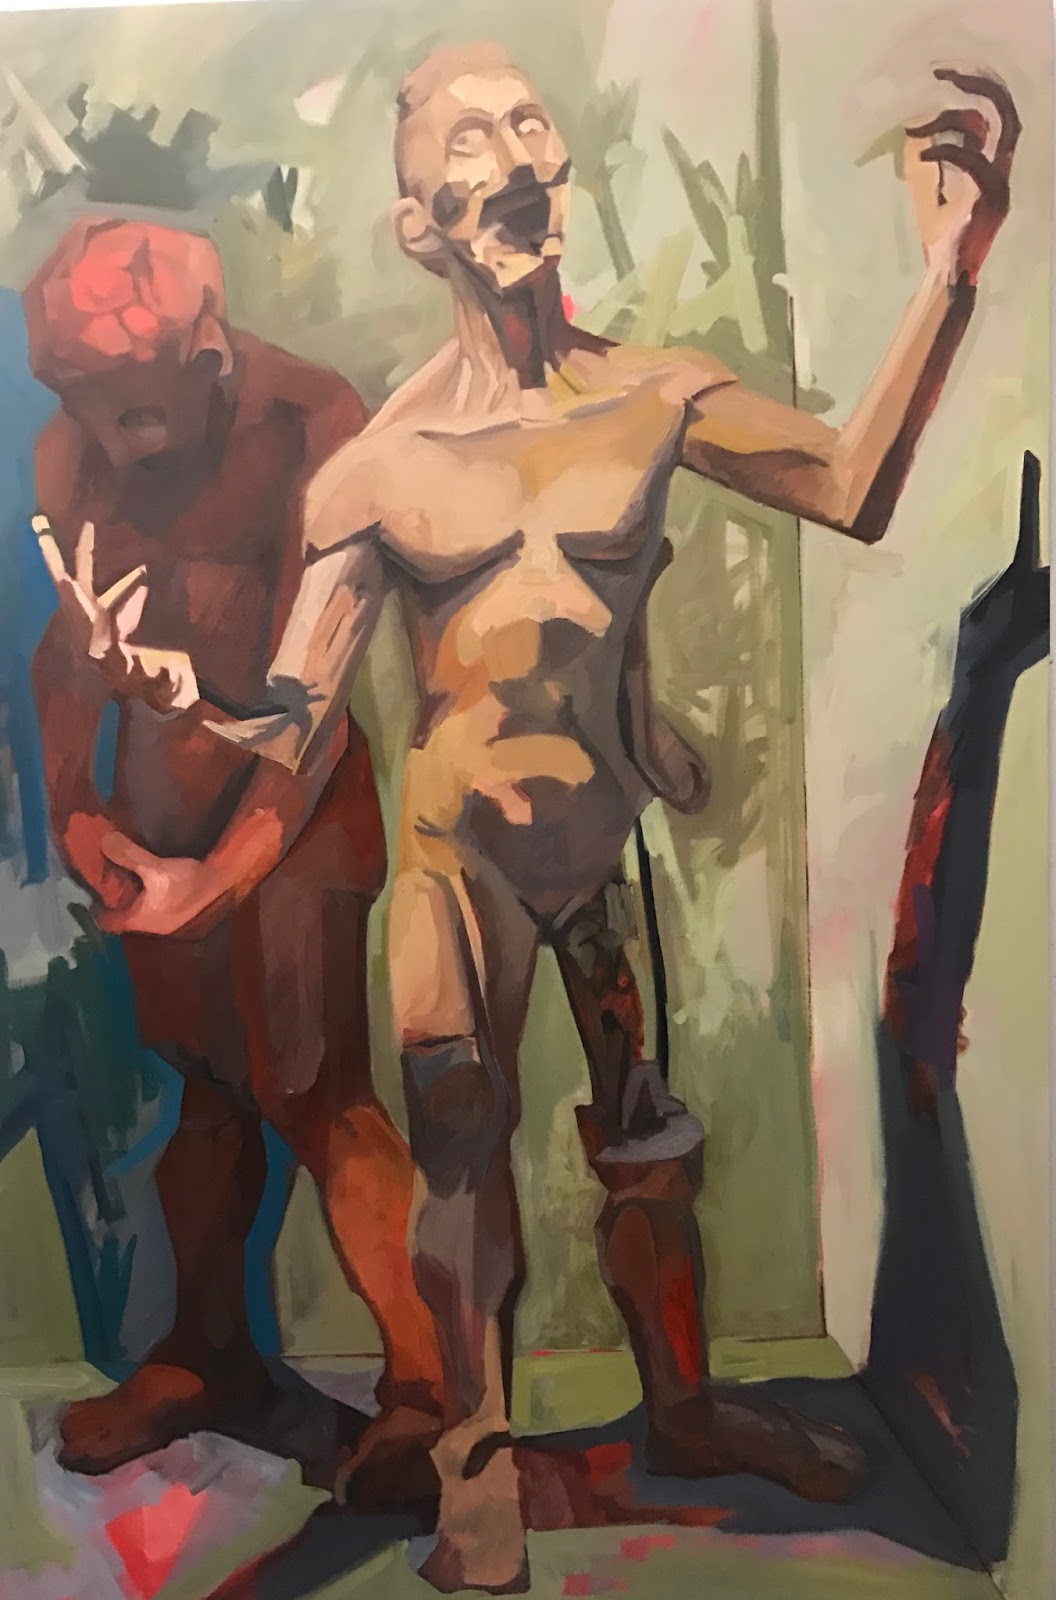
Large Painting #4 - Day 3
 |
| Figures #4 - Day 3 , Oil on Canvas, 72"x48" 2017. |
The central figure looks kind of stiff. Its some problem with the drawing of his legs.
Sunday, February 19, 2017
Large Painting #4 - Day 2
 |
| Figures #4 - Day 2 , Oil on Canvas, 72"x48" 2017. |
The biggest change is to the second figure. I reshaped an earlier maquette into this pose and blocked it in the outline. I am finding working this particular way that it is easy to lean on distortion and anger for an emotional response. Its really easy to tear apart of break the form. I wonder what is the extent of this emotional vocabulary.
Its starting to pull together.
Saturday, February 18, 2017
Large Painting #4 - Day 1
 |
| Figures #4 - Day 1, Oil on Canvas, 72"x 48", 2017. |
Working from the clay models then translating them into a painting has been very productive.
I am working from a few small study drawings that lead me to this image. Standing in front of the 6 foot image the half figure is a little less interesting and reading very zombie movie. The distortions of the figures im trying to make them look less gory more that is an intrinsic state of the figure.
Today I toned the canvas with Cadmium Red then worked in Raw Umber for the initial under painting.
I think tomorrow im going to start on the dead palette.
Tuesday, February 7, 2017
Anatomical Drawing Long Pose - Day 3
 |
| Anatomical Drawing #1 - Reign and Dave, 18"x 24", Graphite on Paper, 2017 |
Dan Thompson's lesson today was all about the knee so it felt only right to focus on the knees of the models. This drawing is great for comparative purposes. There is a lot of difference between the male and female model's knees.
There is balancing act between what is there observationally and what should be there. The puzzle of observing a body and relating it to a theoretical system individual to the artist. Keeping it interesting is always the challenge of these poses.
Before class next week I hope to get the background nailed in.
Tuesday, January 31, 2017
Anatomical Drawing - Long Pose Day 2
 |
| Anatomical Drawing 1 - Reign and , 18"x24", Graphite on Paper, 2017 |
Dan structure his class with a lecture then a demo and then a long pose for the rest of the class.
The drawing is progressing nicely. I have the major forms in and now need to work on the details of the smaller forms.
Friday, January 13, 2017
Forensic Sculpture 2017 - Day 5
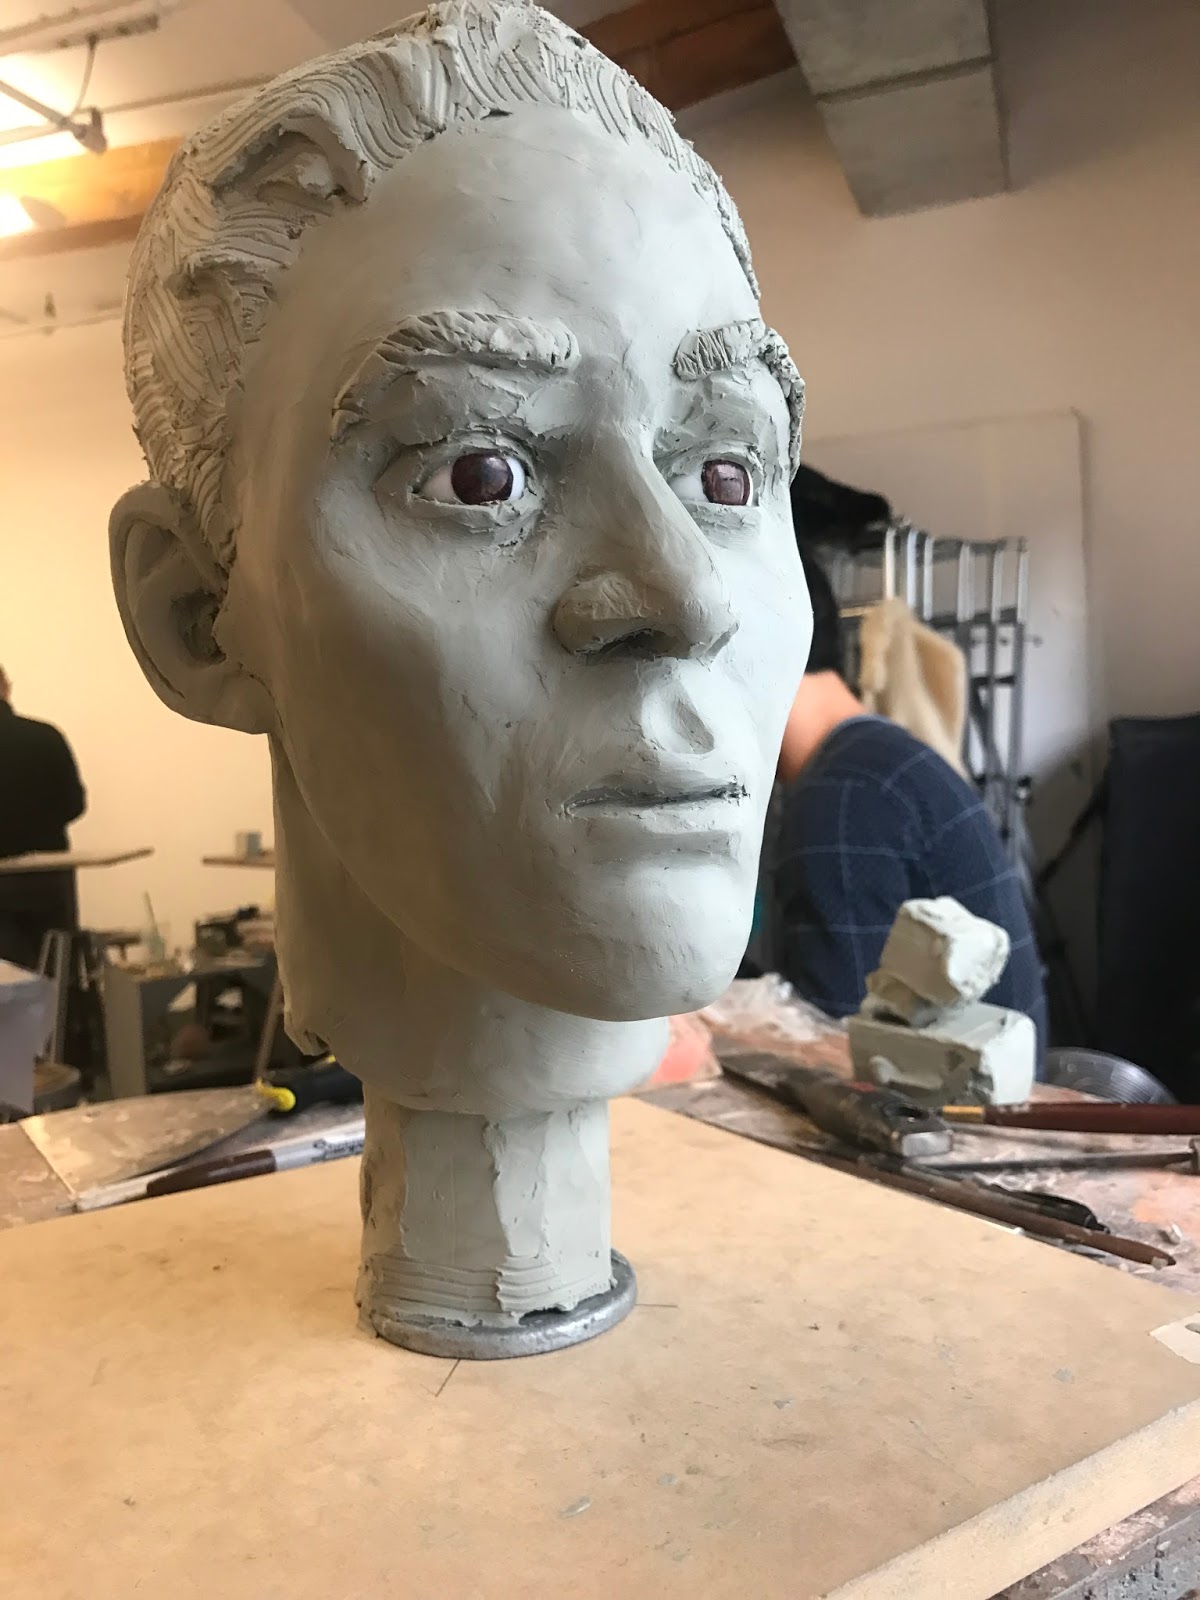 |
| Forensic Sculpture - Day 5 |
This is the completed sculpture.
I will re-post this initial information found about the person:
M-85-3894
Sex: Male
Age: 18-25
Ancestry: White, including Hispanic
Height: Approximately 5'7"
Tooth Loss: All missing teeth would have been present during life.
Damage:
There is an autopsy cut along the cranium. The right zygomatic arch
should be completely (the space is due to a 3-D printing error). There
is missing bone associated with the nasal (top of the nose) that is the
result of damage.
Circumstances: Body found in 1985
Other information: Black, wavy hair approximately 3-4 inches in length.


There is the feeling of accomplishment after doing this class that is really hard to describe. I consider myself pretty much a secular humanist these days but find my thoughts keep returning to Catholic teachings about the Parable of the Talents. This class is an opportunity to use my skills for a greater goal, in this case giving a face to an unknown person and hopefully finding this person's identity.

So this is the final step of the process where the clay sculpture is scanned into the computer. Again this class was a lot of fun. I would do it again in a heartbeat.
Thursday, January 12, 2017
Forensic Sculpture 2017 - Day 4
 |
| Forensic Sculpture 2017 - Day 4 |
I ended really late today, after 9pm. I lost track of time and there was a lot that had to be done.


With the lips complete, we then worked on the rest of the tissue depth markers.

Next, we added ears to the sculpture. I did not have enough time to carve them nicely so they were just blocked in for a while.
I filled in the markers roughly, then distinguished the parts of the face I learned from Che's Ecroche Class (Mouth Muzzle and rest of the face). I also started to add the hair.

When working on the hair, I realized my first pass was not nearly enough, so I added a lot more. It was also getting late and so I stopped for the day.
Wednesday, January 11, 2017
Forensic Sculpture 2017 - Day 3
 |
| Forensic Sculpture 2017- Day 3 |
The likeness is also starting to emerge from the clay. It really is remarkable.

This is where we left off yesterday. Filling in around the eyes was the first step of the day, reinforcing the area around the eyes and readying for the eye lids to be added.

Then we added the eyelids. There is a depression in the eye socket that corresponds to how the eyelid folds on the eye. This skull had a lateral depression, so it meant the eye lids would pull up on the outside of the eyes.

With the eyelids completed, the next step was to work on the nose.

This is done by using toothpicks to determine the shape of the nose based on the structures of the skull. Using this gives an idea of the general size of the nose, but tells very little about the structure of the nostrils of the bulb of the nose itself. The instruction was then to make it very generic other then the size of the nose.

After completing the nose, we ended day 3.
Tuesday, January 10, 2017
Forensic Sculpture 2017 - Day 2
 |
| Forensic Sculpture - Day 2 |
Even at this stage, I am struck by how narrow the sides of this person's face was. I even got a comment from the forensic anthropologist. He also commented that the body was found with a substantial amount of hair.
So the main part of the class was the adding of the tissue depth markers to the skull

Here is a website with the tissue depth markers we used (So the internet literally has everything). Putting them on a piece of paper made it way easier to keep my place when working. This was a real improvement from last year.

Here is the skull with the markers in place.
The next step was to create the eyes.

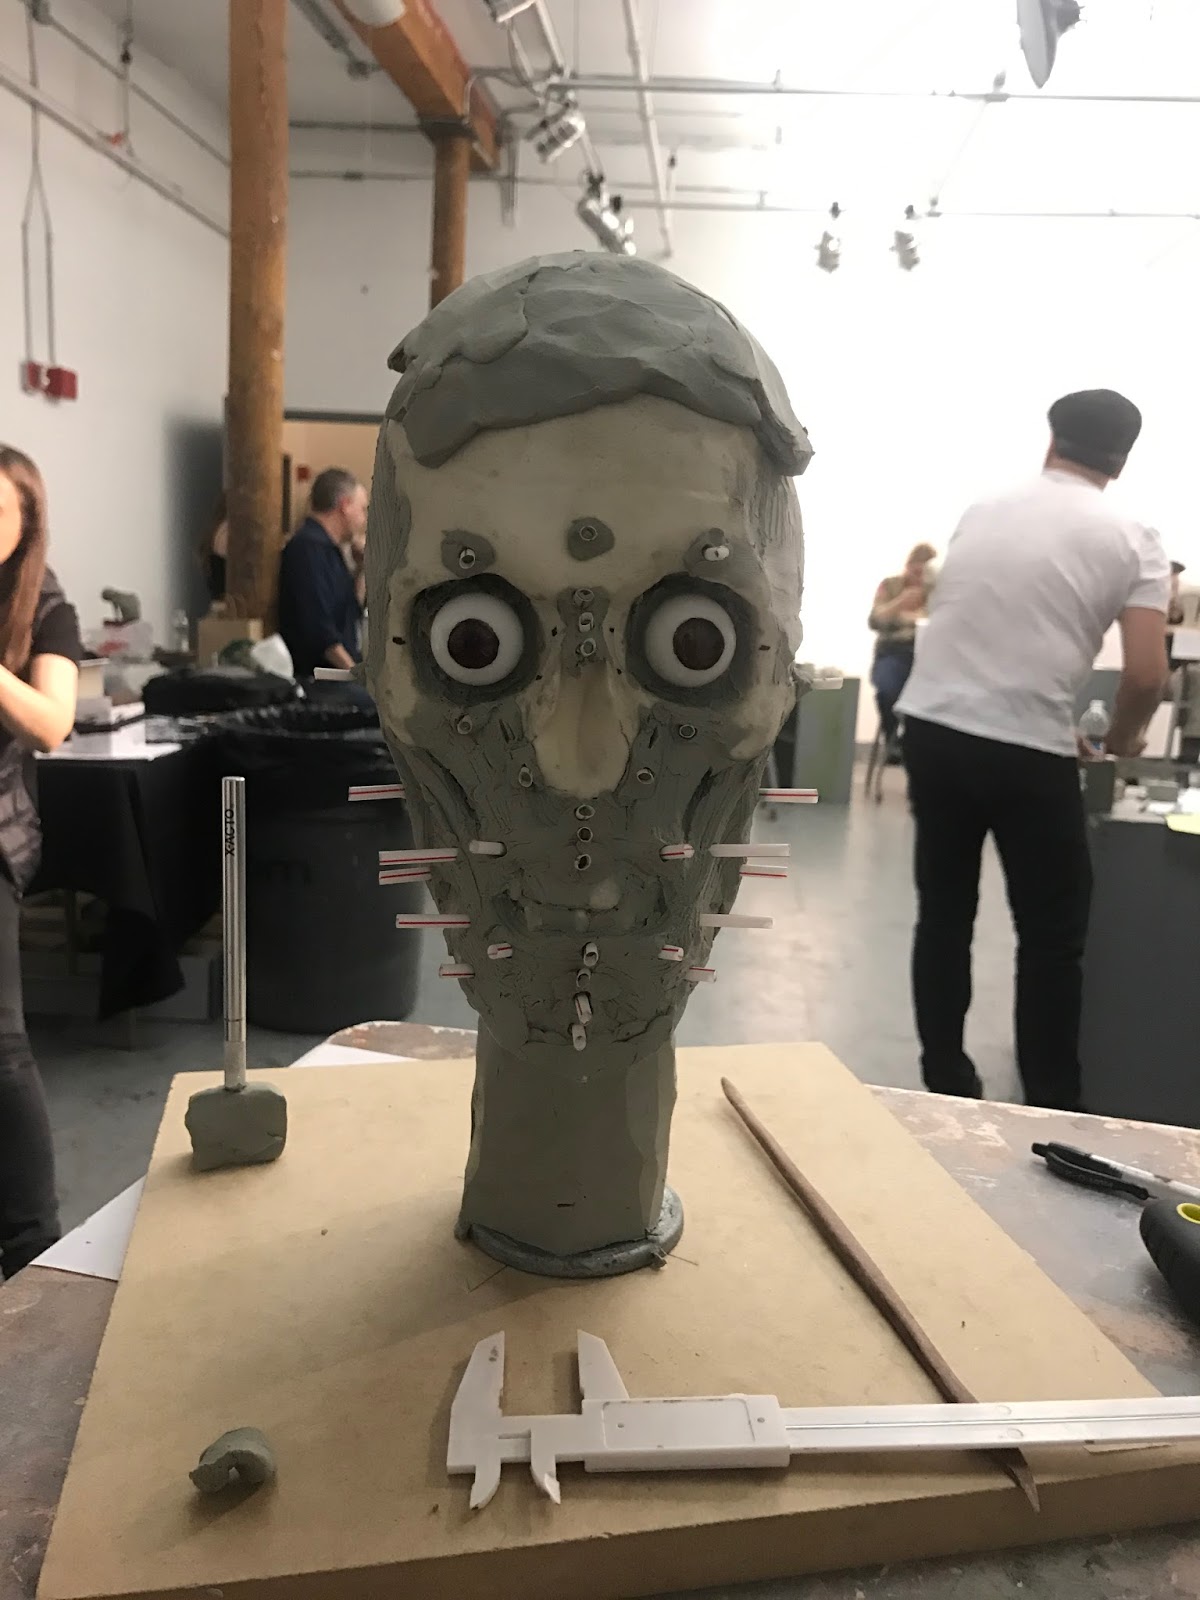
So the final step for the day was to place the eyes in the skull. The main rule for placing them was to center them in the eye socket. Depth in the socket was my main problem. The Eye has to protrude from the skull enough to block a putty knife from resting across the socket diagonally. The real challenge was getting both eyes symmetrical and embedded at the same level.
Monday, January 9, 2017
Forensic Sculpture 2017 - Day 1
 |
| Forensic Sculpture - Day 1 |
So I decided to retake the Forensic Sculpture workshop at the Academy. I had a blast last year, learned a lot, and felt like my artistic skill was being used for a novel purpose. This year again, I will be creating an accurate skull-to-face reconstruction.
So this is the information about my Skull:
Sex: Male
Age: 18-25
Ancestry: White, including Hispanic
Height: Approximately 5'7"
Tooth Loss: All missing teeth would have been present during life.
Damage:
There is an autopsy cut along the cranium. The right zygomatic arch
should be completely (the space is due to a 3-D printing error). There
is missing bone associated with the nasal (top of the nose) that is the
result of damage.
Circumstances: Body found in 1985
Other information: Black, wavy hair approximately 3-4 inches in length.
I was shocked by how much I had forgotten from the first class, so I am going to use this blog to document the steps of forensic sculpture.

The skull stand is made up from bits of hardware screwed together with a piece of metal sandwiched between. The idea is to create an adjustable stand for the skull's palette.

After the skull stand was complete, we now begin to prep the skull. First step is to connect the jawbone to the skull. This is done by recreating the cartilage that connects these two bone together, using super glue and cotton swabs. The super glue fumes from the almost 20 skulls in the tiny room got a little too much for me to handle. I had to step out of the class for a bit to catch some air.


Now the skull is stable and passed the requisite test of turning the whole structure upside down and seeing if it would fall off.

Did I mention I had a blast last year in this class? Here I am in the foreground, working the class:

Wednesday, January 4, 2017
Ecroche Arm #2
 |
| Arm Ecroche #2 Oil Clay |
I'm taking pictures of this sculpture that I did for my Advanced Anatomy class at the New York Academy of Art. This is the second arm écorché I did. I am pretty happy with it. The arm's twist made the piece a bit of a challenge.
I have a few views of it. What do you think?


Tuesday, May 17, 2016
Graphic Novels classwork - The Hunt

Subscribe to:
Posts (Atom)